HBD Google +15 yrs
Assignment:
1: Business Card
2: Multimedia Essay
3: Photoshop Filters
4: Postcard via Photoshop Layers
5a: Opacity
5b: Photoshop coloring with Fill function
5c: Black & White with color tints
6a: Gradient (chick)
6b: Gradient Creation (3 gradient options + 1 brush stamp)
6c: Cover for PowerPoint
Mid-Final: Powerpoint of assignment 1-6c
************ "Tutorial Board ***********
7: Glass Text Effect of your first name
8: Photo-filled text effect of your Last name
9: Plastic texture text effect of your Last name with Class of 20 _ _
10: Test "Crazy" text effect of your first name
Final Powerpoint
Create & upload to your own blog.
Friday, September 27, 2013
Thursday, September 26, 2013
#7-10: Photoshop TEXT effects....
goto tutorialboard.net
http://www.tutorialboard.net/category/photoshop/text-effects/
choose photoshop basics
then text effects.
assignment #7-10
Archive for 'Text Effects'
7: Due 9/30/13 >>> http://www.tutorialboard.net/photoshop-glass-text-effect/
Photoshop Glass Text Effect
Hello and welcome to another free Adobe Phtotoshop tutorial, today we are going to create a Photoshop Glass Text Effect. We are going to demonstrate how you can achieve in just a couple of steps a Photoshop Glass Text Effect only using layer styles, also the PSD file is available for download to copy and paste the effect.Continue Reading

Create eye-catching PHOTO-FILLED TITLES in Photoshop
In this easy to follow tutorial we are going to pull off a filling text effect with a image We are going to type text and use a clipping mask to clip the photograph so that it only shows through the letters. Because the letters are on an editable type layer, you can change the text even after the letters are filled with the image.Continue Reading

How to make a Plastic Text in Photoshop CS4
Posted by Olson.
9
In this tutorial, we’re going to create a Plastic Text effect using layer styles one of the coolest features of Adobe Photoshop CS4, with layer styles we can create all sorts of effects glass, plastic, ice, water, metal, and many more so without losing any more time let’s get started. You can download the PSD file at the bottom of the tutorial if you’d simply like to copy+paste the layer styles.Continue Reading
10: Due 10/10/13>>>http://www.tutorialboard.net/create-a-crazy-text-effect-using-layer-styles/=10=10=10=
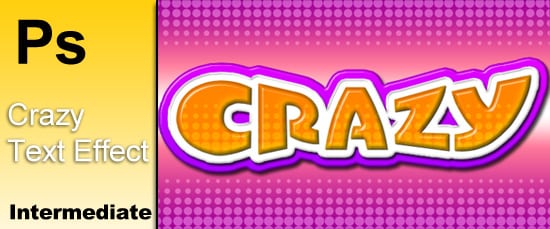
 Create A Crazy Text Effect Using Layer Styles
Posted by Olson.
In this tutorial we are going to create a cool text effect from ground up,by using layer styles and a couple of phtoshop filters to achieve a interesting cool looking effect. The text effect tutorials are covered many times by different tutors and photoshop related websites but with layer styles the possibility’s are endless and mastering them is the key to your success to create unique designs.Continue Reading
Adobe Photoshop :: Cool Gradient Graphic Tutorial - YouTube
www.youtube.com/watch?v=DLiszJMuDPU
6B
6B
6c :cover for powerpoint
extension video to add more effect to project 6c
goto http://www.youtube.com/watch?v=m4prm8aF6M8
extra credit: http://www.youtube.com/watch?v=QDyNANQ8f-M
*******************************************************************************
Down your own LEGAL copy of the CS2 Photoshop
its Free because its a pretty old version, but at least its legal! and you can still get your assignments done :-)
https://www.adobe.com/cfusion/entitlement/index.cfm?e=cs2_downloads
https://www.adobe.com/cfusion/entitlement/index.cfm?e=cs2_downloads
Monday, September 23, 2013
#6: Gradient tool effects in Photoshop.
6A: Explore Gradient tool - draw a gradient Chick
Open a new Photoshop file 7"x5" 72 resolution
click on the gradient tool
then select the " foreground color to transparent mode"
choose "Yellow" for the body of the Chick
from the center of your canvas draw a radius to decide how big your Chick will be.
con't at this setting and change the color to WHITE to draw the Iris of its eyes.
Change tool to brush and set the color to black and then dot the Pupil of the eyes.
Back to gradient tool and choose the "diamond gradient" to create the beak.
Draw in the missing feet with the brush tool.
Lastly choose the stamping option and choose #134 for the grass... (color of the grass can be set to green at this point).
Add text to complete the project.
Save as .PSD and .JPEG and send as attachment.
******************************************
6B: Create your own drawing using the gradient tools and stamping tools.
Use the other gradient tool options (3 out of 5)
and Stamping tool
Be creative!
*****************************************
6C: Cover for the powerpoint.
Open a new File with the following dimension 1366 x 768 pixels with 300 resolution in a white background.
Also make sure your foreground and background color are set to black and white color
goto Window menu and select layers to toggle the layer window
Duplicate the layer by right clicking the background layer.
goto Filter and choose Render --> FIBER set the Variance to 40 and Strength of 4
then another Filter choosing Blur --> Motion Blur with Angle of 90 and distance of 999
your pciture should have "streaks"
Goto Blending mode (by right clicking on the layer) check gradient overlay of rainbow with 0 degrees don't forget to overlay the gradient over the "streaks"
Finally, input the text of your name's 1st Marking Period Multimedia Portfolio TZS11-02,5,6,8 (choose your period) check off outer glow and others effects you like for the fonts.
 save in .PSD and then .JPEG add as the first slide to your Powerpoint.
PDF the powerpoint and send in for the 50% of your report card :-) if you want 100% make sure its submitted by today!
E.C.
http://www.youtube.com/watch?v=QDyNANQ8f-M
Open a new Photoshop file 7"x5" 72 resolution
click on the gradient tool
then select the " foreground color to transparent mode"
choose "Yellow" for the body of the Chick
from the center of your canvas draw a radius to decide how big your Chick will be.
con't at this setting and change the color to WHITE to draw the Iris of its eyes.
Change tool to brush and set the color to black and then dot the Pupil of the eyes.
Back to gradient tool and choose the "diamond gradient" to create the beak.
Draw in the missing feet with the brush tool.
Lastly choose the stamping option and choose #134 for the grass... (color of the grass can be set to green at this point).
Add text to complete the project.
Save as .PSD and .JPEG and send as attachment.
******************************************
6B: Create your own drawing using the gradient tools and stamping tools.
Use the other gradient tool options (3 out of 5)
and Stamping tool
Be creative!
*****************************************
6C: Cover for the powerpoint.
Open a new File with the following dimension 1366 x 768 pixels with 300 resolution in a white background.
Also make sure your foreground and background color are set to black and white color
goto Window menu and select layers to toggle the layer window
Duplicate the layer by right clicking the background layer.
goto Filter and choose Render --> FIBER set the Variance to 40 and Strength of 4
then another Filter choosing Blur --> Motion Blur with Angle of 90 and distance of 999
your pciture should have "streaks"
Goto Blending mode (by right clicking on the layer) check gradient overlay of rainbow with 0 degrees don't forget to overlay the gradient over the "streaks"
Finally, input the text of your name's 1st Marking Period Multimedia Portfolio TZS11-02,5,6,8 (choose your period) check off outer glow and others effects you like for the fonts.

PDF the powerpoint and send in for the 50% of your report card :-) if you want 100% make sure its submitted by today!
E.C.
http://www.youtube.com/watch?v=QDyNANQ8f-M
Wednesday, September 18, 2013
#5: (a) Shapes and (b) color filling with (c) tints.
5A: Opacity
in photoshop choose ellpise shape tool to create circles of basic primary colors and set them in Opacity of 35%, 55% and 85%
5B:Coloring
in Photoshop use Magic Wand to select and then Fill with desired color.
see Pupil Path for detailed instruction.
****************************************************************************************************
Please update your Powerpoint Folder with summary (due next week Wed). Mid report card check... How are you doing so far? still 100%?
****************************************************************************************************
5C: Coloring tinting a B & W photo
Look for a B&W photo. and open it Photoshop. (make sure your layer window is open, so you can see which layer you are working on).
right-click and choose > Duplicate layer> name this layer "color tint".
use the > "Magnetic Lasso" to choose the area you wish to tint. You must completely enclose the area by clicking to indicate when you want the magnetic lasso to end.
>edit> FIll> color> adjust Opacity. Reapeat until the subject is completely tinted.
save as 5C-BW-tinted by your name.JPG
then expand (use Canvas size) to set it as before and after. send final JPG to complete assignment.
Continue to update powerpoint.
Have a good week end ;-)
Monday, September 16, 2013
#4: Postcard using Photoshop layers...

Fill back ground with a color that compliments the postcard collage you made yesterday.
Add text “T” to this background (Text layer)
Once you select the type of Font and size (choose the thickest ones so your postcard shows through) save it as Postcard text.JPG.

Wednesday, September 11, 2013
#3: Photoshop Filters (Layers)
use the photo you have from the business card to do the following.
Open Photoshop from the menu open your photo apply filter save as the filter name
Step back to the original and repeat with another filter.
you will have 8 differnet filtered effect photos at the end.
Open up Publisher
select a blank page layout the page in a tie-tac-toe format
place the origial photo in the middle and rest of the 8 filtered photos around it.
add label all the photos on this page. and convert to pdf.
submit pdf via email archive to powerpoint as assignment #3 with summary.
#2 - Essay due 9/11/13 at 5pm
Quick research on the definition of Multimedia… provide examples.
Software that help create multimedia.
- Microsoft Office: Publisher, Powerpoint
- Adobe Photoshop, Illustrator
- Google sketch Up
- other programs… video editing APP
Careers that uses multimedia. Will it be helpful in your future career goals?
Software that help create multimedia.
- Microsoft Office: Publisher, Powerpoint
- Adobe Photoshop, Illustrator
- Google sketch Up
- other programs… video editing APP
Careers that uses multimedia. Will it be helpful in your future career goals?
Monday, September 9, 2013
#1 Welcome to Fall 2013 semester of Multimedia

You will need internet and computer with the following software.
Microsoft Power point,
Publisher,
Photoshop,
Illustrator, and
Google Sketch Up
Prefer Google acct – (mcsmtd@gmail.com)


Quick research on the definition of Multimedia… provide examples. Software that help create multimedia. - Microsoft Office: Publisher, Powerpoint - Adobe Photoshop, Illustrator - Google sketch Up - other programs… video editing APP Careers that uses multimedia. Will it be helpful in your future career goals?
Subscribe to:
Posts (Atom)