Back to Photoshop!
By separating the RGB channels - red and blue to be exact, to create the illusion of "3D" click the picture for instruction. Due 12-20-13
you may want to save this diagram on your desktop "count" the "Diamonds" easily. ask for a hard copy if that's easier for you.
go under window and click on instructor if you get stuck with a tool button.
getting the precise measurement:
after you set the view needed to draw the face of the block. click on line tool and then type in the dimension box (lower right corner) to type in the desired measurement. For example if you want a vertical line that is 5 feet tall, then type 5' (' = feet).
(click on a starting point and move your mouse towards the direction you want the line to draw...then type the measurement. like block #1 =LxWxH of 8'x 5'x5')
A checklist was given out on Monday 11-18-13 for you, so you should have already email all the assignments and updated your blog from #11 to 18....
Here's a recap of Photoshop & Illustrator assignments #11: Flyer from scratch of "Noche de Ciencias" or PJ DAY 2013 on Dec 20, 2013 #12: Adding Texture via Layers #13: Change one thing Poster from NYC Food Bank #14: Jack O' Lantern #15a & b: Creating a "Painted" effect on wall then face. #16: Smart Filtering with Motion Blur #17: Quick Masking to add a desire effect #18: Soft Filtering Skin tones.
^V^V^V^V^V^V^V^V^V^V^V^V^V^V^V^V^V^V^V^V^V^ 2nd Marking Period ^V^V^V^V^V^ Adobe Illustrator #19: USB Drive #20 Wireless Phone (test) due 11-27-13 last day of the marking period
Now you are done you can show off your BLOG to your family at Thanksgiving....
have them leave a comment =) Have a safe and wonderful Thanksgiving - Miss Wang
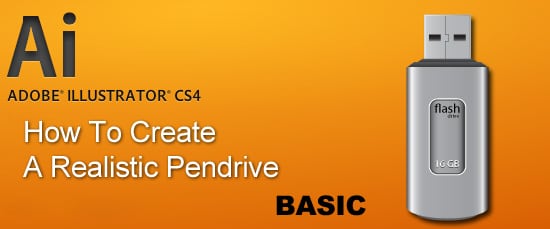
This is a guest post by Ubiratan Cunha in this Adobe Illustrator tutorial he will show us how to create a realistic pendrive only using shapes and gradients. Observation to details like lights and shades can make all the difference. Hope you enjoy it!
***************************************************************************************************************
Test Time!
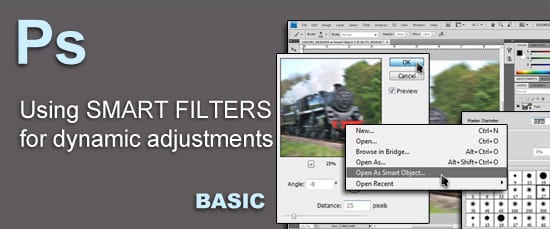
To start using Smart Filters you need first to create a Smart Object Layer. Actually, any filter applied to a smart object layer becomes a Smart Filter. This type of method is completely nondestructive and offers more image-editing flexibility than ever before.
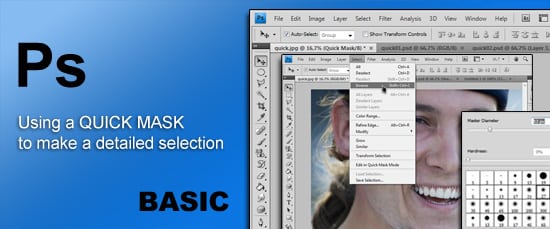
In Photoshop you can make selections in many different ways but if you are looking to capture those small details and be very precise than this easy to follow tutorial will get you up to date and you will be making crazy detail selections in minutes.
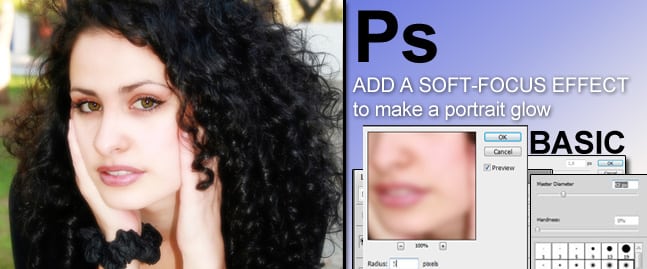
In this easy to follow tutorial we are going to add a soft-focus effect to a portrait that not only minimizes skin imperfections but also adds a romantic glow to the subject’s skin and still keeps the subject’s main features in focus. This technique is a must now for everyone who want to work in the photo retouching department.
This is a guest post by Ubiratan Cunha in this Adobe Illustrator tutorial he will show us how to create a realistic pendrive only using shapes and gradients. Observation to details like lights and shades can make all the difference. Hope you enjoy it!
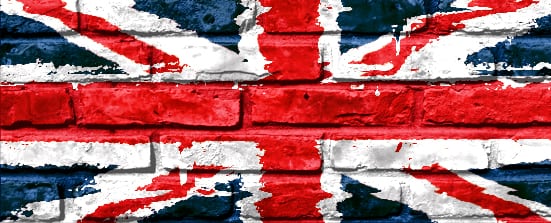
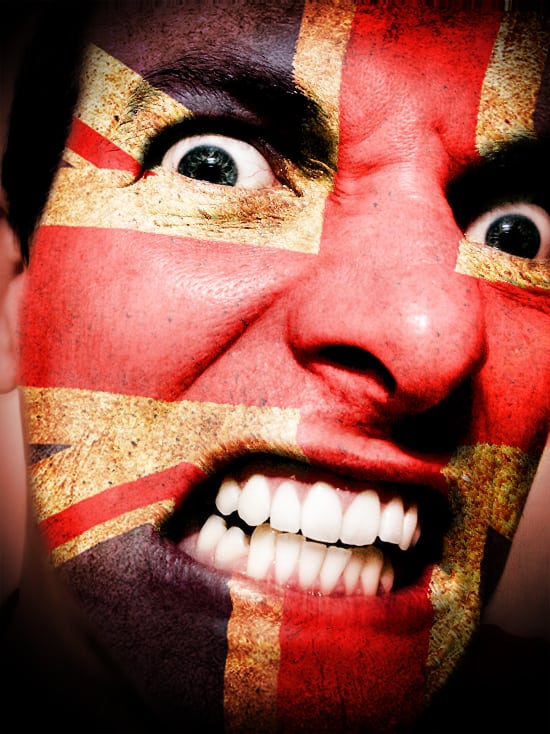
substitute brick wall with Selfie (head shot) and another flag or image.
Due 11-7-13
update blog for mid marking report card 11-8-13
In this tutorial we are going to create a painted effect look by overlaying an image distorted with a Displacement Map.The Displace filter is one of several Photoshop filters that require the use of a displacement map, which works like a texture map, placing the image over a grid that creates a textured look.
this week is also the middle of the marking period.
BLOG needs to be updated to 15B for the BLOG check.
**************************************************************
Extra credit: Using Publisher create a brochure with all the assignment up to this point.
Using what you learned from assignment #12 think about how you can mimic the official Poster from Food Bank NYC's EATWISE Program for Teens. learn more at http://eatwiseteens.org/ or go to http://www.foodbanknyc.org
Identify the different elements that make it Multimedia… what PS effect do you see in the official poster from Food Bank
To get a 100 on this assignment you must:
state the background - Solid or gradient?
how you created the "new" food?
correctly identify the type of blending options used in this poster.
and research the benefit of the Healthy food for your main headline; sub-headline.
Lastly add a disclaimer for the use of the NYC FOOD BANK logo. post this on your summary:
The NYC FOOD BANK Logo was used solely for educational purpose. No Copy Right infringement was intended.
http://www.tutorialboard.net/texture-layer-modes/
Boys find a suit picture.
Girls find a dress.
then a picture of sometype of texure.
save and open both in photoshop then follow instruction on http://www.tutorialboard.net/
a flyer is a way of communicating about an event to the public. The basics are the 5 Ws - Who, what, when, where and why... There's an event coming up this Thursday night - Noche de Ciencias. Please use what you learned in 1st marking period to design a flyer for this event.(the heading needs to be one of the text effects from 1st marking period; unless you want to combine them all).
here are the 5 Ws:
Who: Sponsored by LAESA SHPE from City College of NY for MCSM students
what: (Science Night) Noche de Ciencias
when: Thursday night Oct 17, 2013 from 4:30 to 8:00 PM
where: MCSM Cafe
and why: to bring awareness of (STEM) Science, Technology, Engineering, and Mathematics to K-12 students.
Due 10-17-13
Open your powerpoint (.pptx) and save it as JPEG. (it would be in a folder now)
Open slide2 (business card) in Photoshop and blur out your personal info (save in Jpg)
Now log in to BLOGGER.com with your gmail info and make a new blog titled “ your name’s multimedia portfolio” upload all 16 slides.
Send me your blog link! Subject line TZS11-(your period) your FULL name BLOG LINK work
Students made a powerpoint for all of their assignment for the 1st marking period.
they were asked to save it in JPEG form for each slides. They look over for any personal information they do not want to share and photoshop that portion out before posting online to their own blog. This blog will be on-going with updates weekly. We use Google's Blogger for FREE websites! :-)
Assignment:
1: Business Card
2: Multimedia Essay
3: Photoshop Filters
4: Postcard via Photoshop Layers
5a: Opacity
5b: Photoshop coloring with Fill function
5c: Black & White with color tints
6a: Gradient (chick)
6b: Gradient Creation (3 gradient options + 1 brush stamp)
6c: Cover for PowerPoint
Mid-Final: Powerpoint of assignment 1-6c
************ "Tutorial Board ***********
7: Glass Text Effect of your first name
8: Photo-filled text effect of your Last name
9: Plastic texture text effect of your Last name with Class of 20 _ _
10: Test "Crazy" text effect of your first name
Final Powerpoint
Create & upload to your own blog.
Hello and welcome to another free Adobe Phtotoshop tutorial, today we are going to create a Photoshop Glass Text Effect. We are going to demonstrate how you can achieve in just a couple of steps a Photoshop Glass Text Effect only using layer styles, also the PSD file is available for download to copy and paste the effect.
In this easy to follow tutorial we are going to pull off a filling text effect with a image We are going to type text and use a clipping mask to clip the photograph so that it only shows through the letters. Because the letters are on an editable type layer, you can change the text even after the letters are filled with the image.
In this tutorial, we’re going to create a Plastic Text effect using layer styles one of the coolest features of Adobe Photoshop CS4, with layer styles we can create all sorts of effects glass, plastic, ice, water, metal, and many more so without losing any more time let’s get started. You can download the PSD file at the bottom of the tutorial if you’d simply like to copy+paste the layer styles.
In this tutorial we are going to create a cool text effect from ground up,by using layer styles and a couple of phtoshop filters to achieve a interesting cool looking effect. The text effect tutorials are covered many times by different tutors and photoshop related websites but with layer styles the possibility’s are endless and mastering them is the key to your success to create unique designs.
then select the " foreground color to transparent mode"
choose "Yellow" for the body of the Chick
from the center of your canvas draw a radius to decide how big your Chick will be.
con't at this setting and change the color to WHITE to draw the Iris of its eyes.
Change tool to brush and set the color to black and then dot the Pupil of the eyes.
Back to gradient tool and choose the "diamond gradient" to create the beak.
Draw in the missing feet with the brush tool.
Lastly choose the stamping option and choose #134 for the grass... (color of the grass can be set to green at this point).
Add text to complete the project.
Save as .PSD and .JPEG and send as attachment.
******************************************
6B: Create your own drawing using the gradient tools and stamping tools.
Use the other gradient tool options (3 out of 5)
and Stamping tool
Be creative!
*****************************************
6C: Cover for the powerpoint.
Open a new File with the following dimension 1366 x 768 pixels with 300 resolution in a white background.
Also make sure your foreground and background color are set to black and white color goto Window menu and select layers to toggle the layer window
Duplicate the layer by right clicking the background layer.
goto Filter and choose Render --> FIBER set the Variance to 40 and Strength of 4
then another Filter choosing Blur --> Motion Blur with Angle of 90 and distance of 999 your pciture should have "streaks"
Goto Blending mode (by right clicking on the layer) check gradient overlay of rainbow with 0 degrees don't forget to overlay the gradient over the "streaks"
Finally, input the text of your name's 1st Marking Period Multimedia Portfolio TZS11-02,5,6,8 (choose your period) check off outer glow and others effects you like for the fonts.
save in .PSD and then .JPEG add as the first slide to your Powerpoint.
PDF the powerpoint and send in for the 50% of your report card :-) if you want 100% make sure its submitted by today!
Look for a B&W photo. and open it Photoshop. (make sure your layer window is open, so you can see which layer you are working on).
right-click and choose > Duplicate layer> name this layer "color tint".
use the > "Magnetic Lasso" to choose the area you wish to tint. You must completely enclose the area by clicking to indicate when you want the magnetic lasso to end.
>edit> FIll> color> adjust Opacity. Reapeat until the subject is completely tinted.
save as 5C-BW-tinted by your name.JPG
then expand (use Canvas size) to set it as before and after. send final JPG to complete assignment.
Quick research on the definition of Multimedia… provide examples.
Software that help create multimedia.
- Microsoft Office: Publisher, Powerpoint
- Adobe Photoshop, Illustrator
- Google sketch Up
- other programs… video editing APP
Careers that uses multimedia. Will it be helpful in your future career goals?
1 Technology Elective Credit (1 semester).
You will need internet and computer with the following software.
Microsoft Power point,
Publisher,
Photoshop,
Illustrator, and
Google Sketch Up
Prefer Google acct – (mcsmtd@gmail.com)
Quick research on the definition of Multimedia… provide examples. Software that help create multimedia. - Microsoft Office: Publisher, Powerpoint - Adobe Photoshop, Illustrator - Google sketch Up - other programs… video editing APP Careers that uses multimedia. Will it be helpful in your future career goals?


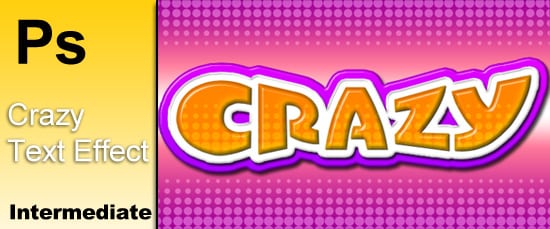
 Create A Crazy Text Effect Using Layer Styles